Are you planning to install a new roof? We’ve got you covered!
In this article, we’ll walk you through the 11 essential steps for a successful roof installation. From assessing the roof condition to cleaning up debris, we’ll guide you every step of the way. Our expert tips and tricks will ensure a sturdy and long-lasting roof for your home. So, let’s dive in and make your roof installation journey a breeze!
Key Takeaways
- Assessing the roof condition is crucial before starting the installation process.
- Proper removal of old roofing materials is necessary for a successful roof installation.
- The roof deck should be thoroughly inspected to ensure its stability and readiness for installation.
- Attention should be given to proper installation techniques such as underlayment, shingle application, flashing, ventilation, and integration of chimneys and skylights.
Assessing the Roof Condition
To begin the process of assessing the roof condition, we first need to carefully inspect the entire surface for any visible signs of damage or wear. This step is crucial in determining the extent of any potential issues and evaluating the overall health of the roof.
During this assessment, we’ll look for indicators such as missing shingles, cracked tiles, or areas of discoloration that may suggest water damage. Additionally, we’ll check for signs of rot, mold, or pest infestation.
By conducting a thorough evaluation of the roof, we can accurately assess the level of roof damage and determine the necessary steps for repair or replacement. Once the roof condition evaluation is complete, we can then move on to the next step of removing old roofing materials.
Removing Old Roofing Materials
After carefully assessing the roof condition, we’ll now proceed to remove the old roofing materials. This step is crucial in preparing the surface for the installation of new roofing materials.
During the removal process, we must handle the disposal of the old roofing materials responsibly to minimize the environmental impact. It’s important to note that certain roofing materials, such as asbestos, require special handling and disposal procedures due to their hazardous nature. By following local regulations and guidelines, we can ensure that these materials are disposed of safely.
Additionally, we must consider the environmental impact of old roofing materials. Recycling or repurposing these materials can help reduce waste and conserve resources. Our team is committed to implementing sustainable practices throughout the roof installation process, including proper roofing materials disposal.
Inspecting the Roof Deck
Once we’ve removed the old roofing materials, we thoroughly inspect the roof deck to ensure its structural integrity. Roof deck inspection is a crucial step in the roof installation process as it helps identify any underlying issues that may affect the new roof’s stability and longevity.
We carefully examine the deck for signs of rot, decay, or water damage. If we find any problems, we proceed with roof deck repair to restore its strength and stability. Common repairs may include replacing damaged sections, reinforcing weak areas, or addressing any issues with the underlying support structure.
Installing Underlayment
Now we begin the process of installing the underlayment, a critical component of a successful roof installation.
Proper underlayment selection is of utmost importance to ensure the longevity and functionality of your roof. The underlayment acts as a protective barrier, shielding your roof deck from water, ice, and other potential damages. It’s crucial to choose the right type of underlayment based on your climate, roof pitch, and roofing materials.
Common mistakes during underlayment installation can lead to costly repairs and compromised roof performance. To avoid these mistakes, make sure to properly overlap the underlayment sheets, securely fasten them to the roof deck, and seal any seams or gaps. Taking the time to install the underlayment correctly will provide added protection and peace of mind for years to come.
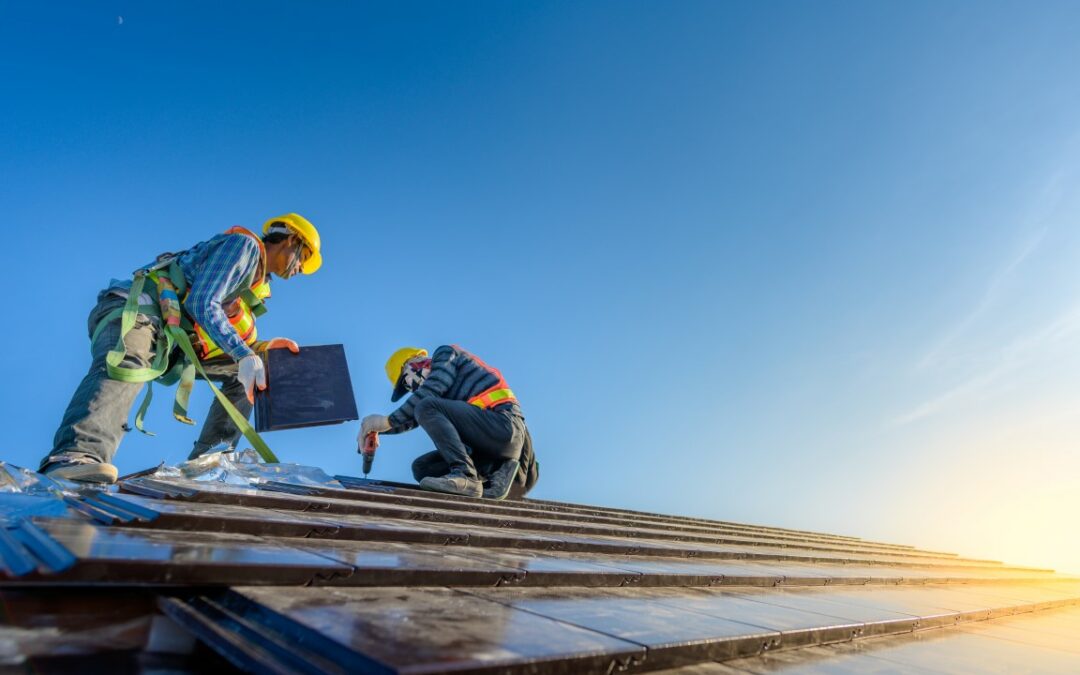
Applying Roofing Shingles
To begin applying roofing shingles, we’ll start by aligning them with the underlayment and securing them to the roof deck using nails or staples.
Roofing techniques play a crucial role in ensuring a successful installation. When it comes to shingle selection, it’s important to consider factors such as durability, weather resistance, and aesthetic appeal. It’s recommended to choose shingles that are suitable for the climate in which your property is located. Additionally, selecting shingles that complement the overall design of your home can enhance its curb appeal.
Proper installation techniques, such as overlapping the shingles correctly and ensuring a secure attachment, are essential for a long-lasting and durable roof.
Flashing Installation
We begin the installation process by applying flashing, a vital component that helps prevent water penetration at vulnerable areas of the roof. Flashing is typically made of metal, such as aluminum or galvanized steel, and is installed around chimneys, vents, skylights, and other roof protrusions. Proper flashing installation is crucial to ensure the long-term integrity of the roof.
To maintain the effectiveness of flashing, regular maintenance is essential. This includes inspecting the flashing for any signs of damage or deterioration, such as rust, cracks, or loose sections. It’s also important to address any flashing issues promptly to prevent water leaks and potential damage to the roof structure.
Common flashing mistakes to avoid include improper installation techniques, using inadequate flashing materials, and neglecting regular maintenance. By understanding the importance of flashing and taking the necessary steps for its installation and maintenance, you can ensure a successful and long-lasting roof.
Ventilation Installation
During the roof installation process, we prioritize proper ventilation installation. Adequate ventilation is crucial for maintaining the integrity and longevity of a roof. When designing the ventilation system, we consider factors such as the roof’s size, shape, and materials used. This ensures optimal air circulation and prevents moisture buildup, which can lead to mold, rot, and other damage.
Regular ventilation maintenance is necessary to keep the system functioning effectively. This includes cleaning vents, inspecting for any blockages or damage, and ensuring proper airflow. Neglecting ventilation maintenance can result in decreased energy efficiency, increased utility costs, and potential health risks.
Chimney and Skylight Integration
When it comes to chimney and skylight integration during roof installation, there are several important points to consider.
First, proper flashing techniques must be used to ensure a watertight seal around both the chimney and skylight. This involves using high-quality materials and expert installation methods. Additionally, waterproofing the chimney base is crucial to prevent water infiltration and potential damage to the roof.
Proper Flashing Techniques
To ensure a successful roof installation, proper flashing techniques must be employed for integrating chimneys and skylights. Flashing maintenance is crucial to prevent leaks and water damage. One of the most common flashing mistakes is improper installation, which can lead to water penetration and structural issues.
For chimneys, step flashing should be used to create a watertight seal between the chimney and roof. Skylights require special attention, as they’re prone to leaks. Proper flashing around skylights involves using a combination of step flashing, head flashing, and apron flashing.
It’s important to ensure that flashing is properly installed and sealed to protect against water infiltration. Regular inspections and maintenance of flashing are essential to prolong the lifespan of the roof and prevent costly repairs.
Waterproofing Chimney Base
Now that we’ve covered proper flashing techniques for integrating chimneys and skylights, how can we effectively waterproof the chimney base to ensure a successful roof installation?
Waterproofing the chimney base is crucial to preventing water leaks and protecting the integrity of the roof. Several waterproofing techniques can be used to achieve this.
First, it’s important to inspect the chimney for any signs of damage or deterioration. Any issues should be addressed before proceeding with waterproofing.
Next, a high-quality chimney flashing system should be installed to create a watertight seal between the chimney and the roof. This involves using a combination of metal flashing, sealant, and proper installation techniques. Regular chimney maintenance, including checking for cracks or gaps, is also essential to ensure long-lasting waterproofing.
By following these waterproofing techniques and maintaining the chimney properly, you can prevent water damage and ensure a successful roof installation. As we move on to the next section about skylight installation considerations, it’s important to keep in mind that proper waterproofing techniques are also crucial for skylights.
Skylight Installation Considerations
As we continue our discussion on successful roof installation, let’s delve into the important considerations for integrating skylights with the chimney.
Proper skylight placement is crucial for maximizing natural light while avoiding potential leaks or damage. When installing skylights near a chimney, it’s essential to ensure proper flashing and sealing to prevent water infiltration.
Skylight maintenance is equally important to extend their lifespan and prevent any issues. Regularly inspect and clean the skylights, removing any debris or buildup that could obstruct the light or cause damage. Additionally, check for any signs of leaks or cracks and address them promptly.
By carefully integrating skylights with the chimney and maintaining them regularly, homeowners can enjoy the benefits of natural light while keeping their roofs watertight.
Now, let’s move on to the next section about ridge cap installation.
Ridge Cap Installation
We install the ridge cap to ensure a secure and watertight roof. The ridge cap is the final piece of the roofing system and is installed along the ridge line where two roof slopes meet. It serves as a protective cover for the exposed edges of the roofing material and helps to prevent water from penetrating the roof.
When installing the ridge cap, it’s important to use high-quality ridge cap materials that are durable and weather-resistant. Common ridge cap materials include asphalt shingles, metal, and ridge vent systems. These materials are designed to withstand harsh weather conditions and provide long-lasting protection for your roof.
Cleaning and Debris Removal
When it comes to roof installation, proper waste disposal, and debris removal are essential steps for a successful project. We need to ensure that all waste materials are disposed of correctly to prevent any harm to the environment and comply with regulations. Additionally, safety during the cleaning process is crucial to protect both workers and property.
Proper Waste Disposal
After completing the roof installation, our next crucial step involves efficiently disposing of waste materials through thorough cleaning and debris removal. Proper waste disposal is an essential aspect of the roofing process, as it ensures not only a clean and organized work area but also minimizes the environmental impact.
Effective waste management is necessary to prevent pollution and protect our surroundings. We take great care in cleaning up any debris, such as old shingles, nails, and packaging materials, and dispose of them responsibly. By following strict waste disposal protocols, we contribute to a healthier environment and demonstrate our commitment to sustainability.
Our team understands the importance of proper waste management and takes pride in leaving your property clean and free of any roofing-related debris.
Safety During Cleaning
To ensure safety during cleaning and debris removal, proper precautions must be taken. Roof cleaning can be a hazardous task, so it’s crucial to prioritize safety at all times. Before starting the cleaning process, it’s essential to evaluate the condition of the roof and identify any potential risks such as loose tiles or unstable areas.
Additionally, choosing the right cleaning products is vital to minimize any damage to the roof and ensure effective cleaning. It’s recommended to use environmentally friendly and non-toxic solutions that are specifically designed for roof cleaning. Always follow the instructions provided by the manufacturer and wear appropriate protective gear, such as gloves and goggles, to protect yourself from any potential harm.
Taking these precautions will help ensure a safe and successful roof cleaning experience.
Final Inspection and Warranty
During our final inspection, we thoroughly assessed the newly installed roof to ensure its quality and compliance with industry standards. This step is crucial in guaranteeing the longevity and performance of the roof.
We carefully examine every aspect, including the materials used, the installation techniques, and the overall workmanship. Our goal is to identify any potential issues or defects that may need to be addressed before the project is considered complete.
Additionally, we check for compliance with any applicable warranties provided by the manufacturer or installer. This ensures that the customer receives the full benefits and protection offered by these warranties.
Once the final inspection is completed, we provide the customer with a detailed report and any necessary documentation to support the warranty coverage.
Conclusion
After following these 11 essential steps, your roof installation will be a seamless and successful process. From assessing the roof condition to applying the final touches, we ensure a high-quality result that withstands the test of time.
Imagine the peace of mind knowing your home is protected by a sturdy and reliable roof, allowing you to sleep soundly even during the harshest of storms. Trust our professional team to deliver excellence every step of the way.