Are you worried about the upcoming roof replacement inspection? Don’t fret, because we’ve got you covered! In this article, we’ll share with you the 9 best tips for preparing for a roof replacement inspection.
From scheduling the inspection to making necessary repairs beforehand, we’ll guide you through each step to ensure a smooth and successful inspection process.
So, let’s dive in and get your roof inspection ready in no time!
Key Takeaways
- Schedule the roof replacement inspection promptly to ensure timely completion.
- Clear the roof of debris for a thorough and accurate inspection.
- Prioritize safety by equipping the team with necessary safety equipment and following strict safety precautions.
- Hire a professional waste management company for proper disposal of debris and consider recycling options to minimize environmental impact.
Schedule the Inspection
We should schedule the roof replacement inspection as soon as possible to ensure the timely and efficient completion of the project. Scheduling conflicts can arise if we don’t act promptly.
To find qualified inspectors, we recommend reaching out to reputable roofing companies or consulting professional organizations such as the National Roofing Contractors Association. These resources can provide a list of certified inspectors who have the necessary expertise and experience to conduct a thorough inspection. It’s crucial to verify their credentials and ensure they’re licensed and insured.
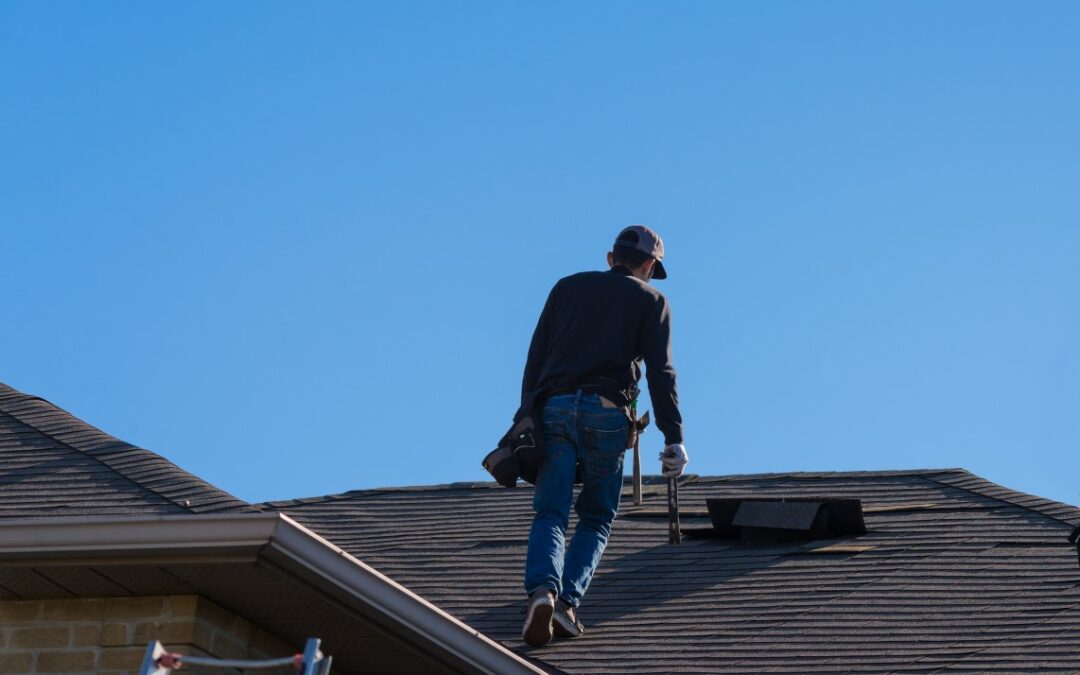
Clear the Roof of Debris
When preparing for a roof replacement inspection, it’s crucial to clear the roof of debris to ensure a thorough and accurate assessment. Our team follows strict safety precautions to prevent any accidents or injuries during the debris removal process. Additionally, we employ proper disposal methods to minimize environmental impact and adhere to local regulations.
Safety Precautions for Debris
How can we ensure the safety of our team and the success of our roof replacement inspection by clearing the roof of debris? Proper debris removal is crucial for maintaining a safe working environment and preventing accidents during the roof replacement process. Before starting the inspection, it’s essential to equip our team with the necessary safety equipment, such as gloves, goggles, and hard hats. These protective gears will help minimize the risk of injury caused by sharp or falling debris.
Additionally, using tools like brooms, rakes, and air blowers will aid in effectively clearing the roof of any loose materials. By prioritizing safety and employing the right equipment, we can create a secure environment for our team and ensure a smooth and successful roof replacement inspection.
To move forward, let’s now discuss the proper disposal methods for the debris we’ve cleared from the roof.
Proper Disposal Methods
To ensure the safe and efficient removal of debris from the roof, we must carefully consider the proper disposal methods. Proper waste management is crucial in this process to minimize environmental impact and adhere to regulations.
One option is to hire a professional waste management company that specializes in roof debris removal. These experts have the necessary equipment and knowledge to safely dispose of the debris.
Another option is to explore recycling options for certain materials such as asphalt shingles. Recycling can significantly reduce the amount of waste that ends up in landfills.
By properly disposing of debris and recycling when possible, we can contribute to a more sustainable and eco-friendly approach to roof replacement.
Now, let’s move on to the next section to discuss preventing future damage.
Preventing Future Damage
To further ensure the safety and longevity of your roof, we must thoroughly clear the roof of any debris. Clearing the roof of debris is crucial for preventing future leaks and maintaining the overall health of your roof.
Debris such as leaves, branches, and dirt can accumulate over time, causing water to pool and seep into your roof, leading to leaks and potential damage. By regularly clearing the roof of debris, you can prevent these issues and extend the lifespan of your roof.
It’s recommended to clear the roof at least twice a year, especially before and after the rainy season. Regular roof maintenance tips like this can help you avoid costly repairs in the long run.
Now that we’ve cleared the roof of debris, let’s move on to the next step and check for any leaks or damage.
Check for Leaks and Damage
Our inspector will thoroughly examine the roof for any leaks and damage during a professional inspection. Checking for signs of leaks and damage is crucial in maintaining the integrity of your roof. Leaks can lead to water damage, mold growth, and structural issues if left unaddressed.
Our expert inspector will assess the condition of the roofing materials, including shingles, flashing, and sealants, to identify any areas of concern. They’ll also inspect the attic for signs of moisture or water intrusion. By conducting a comprehensive examination, we can ensure that any existing leaks or damage are identified and addressed promptly, preventing further deterioration of your roof.
Once the inspection is complete, we can advise you on the necessary repairs or replacement options to protect your home. Now, let’s move on to the next section and discuss how to trim overhanging branches for optimal roof health.
Trim Overhanging Branches
When preparing for a roof replacement inspection, it’s crucial to address the issue of overhanging branches. Clearing tree obstructions is essential to ensure a safe roof and prevent potential damage.
Clearing Tree Obstructions
We recommend trimming any overhanging branches to ensure a clear path for the roof replacement inspection. Tree trimming is essential in preparing for the inspection, as it helps eliminate potential hazards and ensures the safety of both the inspectors and the homeowners.
Overhanging branches can pose various risks, such as falling debris, damage to the roof, and hindrance in accessing different areas of the roof. By trimming these branches, you not only create a safer environment but also provide a better view of the roof, allowing the inspectors to identify any underlying issues more efficiently.
It’s crucial to hire a professional tree trimming service to ensure the job is done properly, minimizing the chances of accidents and damage to the property. Remember, a clear and obstacle-free roof is key to a successful roof replacement inspection.
Ensuring Safe Roof
To ensure a safe roof, it’s important to trim overhanging branches as part of the preparation for a roof replacement inspection.
Overhanging branches can pose a significant risk to the integrity of your roof, especially during severe weather conditions. These branches can scrape against the roof surface, causing damage to the shingles and potentially leading to leaks and water infiltration.
Additionally, branches that are in contact with the roof can obstruct proper ventilation, which is essential for maintaining the longevity of your roof. Hiring a professional contractor to trim these branches is highly recommended, as they have the expertise and equipment to safely remove them without causing any further damage.
Secure Loose Shingles or Tiles
To ensure a successful roof replacement inspection, it’s crucial to address any loose shingles or tiles promptly. Secure shingles and tiles play a vital role in maintaining the integrity of your roof. When shingles or tiles become loose, they can expose the underlying structure to potential damage from water infiltration and strong winds.
To prevent further issues, it’s imperative to secure any loose shingles or tiles before the inspection takes place. This can be done by applying roofing cement or adhesive to the affected areas. In some cases, tile replacement may be necessary if the damage is extensive. By taking the time to address these issues, you not only ensure a smooth inspection process but also safeguard your roof’s longevity.
Now, let’s move on to the next step: cleaning gutters and downspouts.
Clean Gutters and Downspouts
To clean the gutters and downspouts, start by removing any debris or leaves that may have accumulated. This is an essential step in maintaining the health and longevity of your roof. Clogged gutters can lead to water buildup, which can cause damage to your roof and foundation.
To effectively clean your gutters and downspouts, you’ll need a few cleaning tools such as a ladder, gloves, a trowel or scoop, and a hose with a high-pressure nozzle. Begin by using the trowel or scoop to remove any large debris, and then flush the gutters and downspouts with water to ensure proper drainage.
Regular maintenance techniques, such as cleaning your gutters at least twice a year, will help prevent any potential issues and keep your roof in optimal condition.
Now that we’ve discussed cleaning the gutters and downspouts, let’s move on to the next important step: removing satellite dishes or antennas.
Remove Satellite Dishes or Antennas
Before we begin removing satellite dishes or antennas, it’s important to understand the potential impact they can have on the roof replacement inspection. Satellite dish removal and antenna removal are necessary steps to ensure a thorough inspection of your roof.
These fixtures can obstruct the view and access to certain roof areas, making it difficult for the inspector to assess its condition properly. Removing satellite dishes or antennas allows the inspector to examine the roof surface, flashing, and any potential damage or wear. It also ensures that the replacement process can proceed smoothly without any obstacles.
By removing these fixtures beforehand, you demonstrate your commitment to a comprehensive inspection and a successful roof replacement. Once the satellite dishes or antennas have been removed, it’s time to prepare the attic for inspection.
Prepare Attic for Inspection
After removing satellite dishes or antennas, we can now focus on preparing the attic for inspection.
The attic plays a crucial role in the overall health and efficiency of your roof, so it’s important to ensure it’s in good condition. Start by checking the attic insulation. Proper insulation helps regulate the temperature in your home and prevents heat from escaping through the roof. Make sure there are no gaps or areas where insulation is missing.
Additionally, inspect the ventilation systems in the attic. Adequate ventilation helps prevent moisture buildup, which can lead to mold and rot. Ensure that vents are clear of debris and functioning properly.
By addressing these aspects of your attic, you can ensure a thorough and successful roof inspection.
Now, let’s move on to the next step: making necessary repairs beforehand.
Make Necessary Repairs Beforehand
Now that we’ve prepared the attic for inspection, let’s address any necessary repairs beforehand to ensure a smooth roof replacement process. Making necessary repairs is crucial for maintaining the integrity and longevity of your roof. Before the inspection, it’s important to thoroughly inspect your roof for any signs of damage, such as missing or damaged shingles, leaks, or sagging areas.
These issues can compromise the structural integrity of your roof and lead to further damage if not addressed promptly. Additionally, conducting regular roof maintenance, such as cleaning gutters and removing debris, can prevent potential problems and extend the lifespan of your roof.
Conclusion
In conclusion, by following these 9 best tips for preparing for a roof replacement inspection, you can ensure a successful and efficient process. Clearing the roof of debris, checking for leaks and damage, and securing loose shingles or tiles are essential steps to take.
Additionally, trimming overhanging branches, cleaning gutters and downspouts, and removing satellite dishes or antennas will further enhance the inspection. Lastly, don’t forget to prepare the attic and make necessary repairs beforehand.
With these expert tips, your roof replacement inspection will be a breeze!